
Tutorial Video
Work Instruction
Go to the Procedure tab on the Packaging Recipe.
Instructions can be added to each section of the procedure.
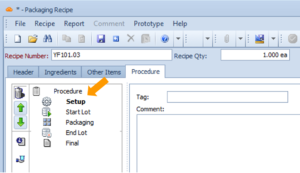
Sections:
- Setup – instructions that must be executed at the start of each order
- Start Lot – instructions that must be executed at the start of each lot on the order
- Packaging – instructions that must be executed repeatedly during order execution
- End Lot – instructions that must be executed at the end of each lot on the order
- Final – instructions that must be executed at the end of the order
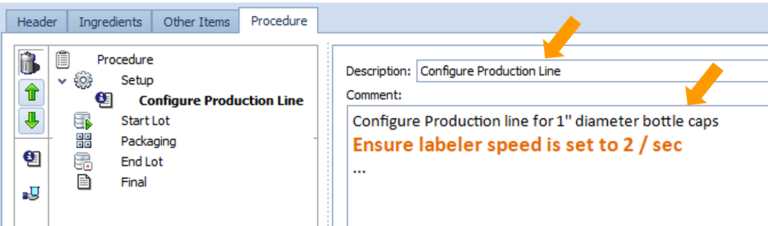
You can put multiple instructions in each section. To add instruction, drag and drop the Instruction icon onto the section
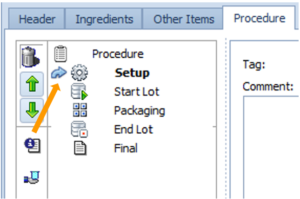
Ender a description for the Instruction, and specify its details in the Comment field. You can format the text as well as paste the pictures, if needed.
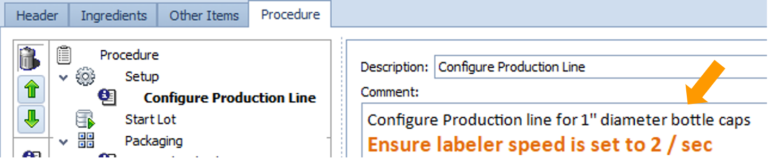
Packaging section
The instructions under the Packaging section must be executed repeatedly during the order, or while the line is running.
If Record First is flagged, then the Instruction must be executed when a line is first started
If Record Last is flagged, the Instruction must be executed whenever a Packaging Line is stopped.
If you enter a Record Frequency, it means that this Instruction must be performed with the specified frequency, which is a number of minutes. If I set 2, it means that this Instruction must be performed every 2 minutes. In the example below, the Weight Check must be recorded every time the line is started and every 2 minutes after the line is started.
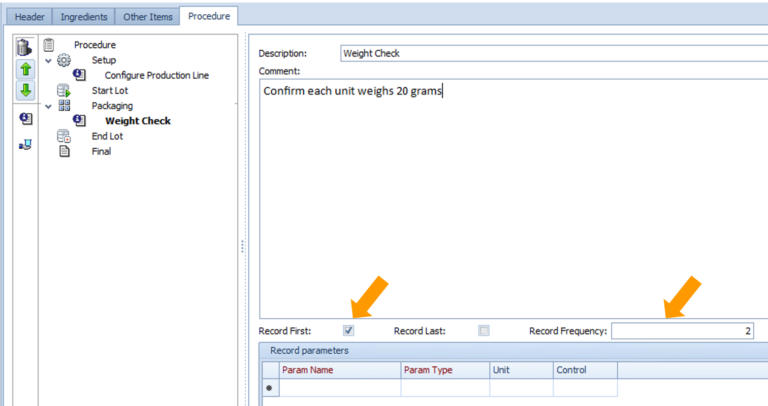
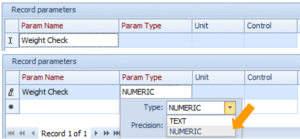
You can specify values that must be recorded during production in the Record Parameters section.

Adding numeric parameters
This allows you to record numeric values during production.
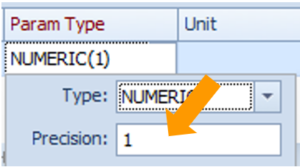
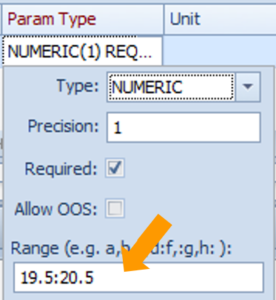
Enter the Parameter Name and Set the Parameter Type as Numeric.
In the Precision field, set the number of digits that must be specified after the decimal place for this parameter.
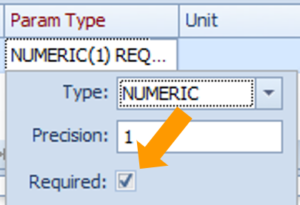
You may flag if this parameter is required. If it is not required, the operator may skip entering the value on the Instruction.
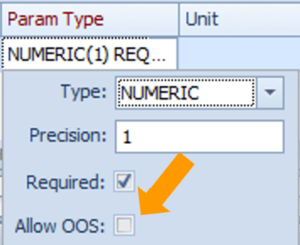
If ‘Allow OOS’ is flagged, it means that the you are permitted to record a value, that is outside the desired range or that is not consistent with the desired results. If you record such a value, the line will be stopped and quality approval will be required to resume production.
If ‘Allow OOS’ is not flagged, you will be stopped from proceeding until you record a value that is within range.
Enter an allowed numeric range here. This means that any value between and including 19.5 and 20.5 will be allowed.
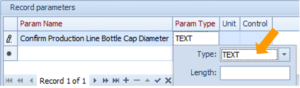
Adding parameters as a checklist
This allows you to add specific confirmation of each point specified in the Instruction.
Set the Parameter Type as Text.
In the ‘Enum’ section, list the allowed results.
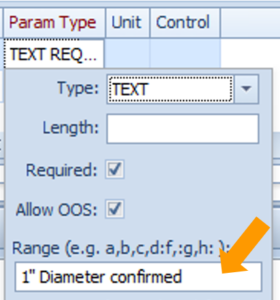
You can also list not allowed results.
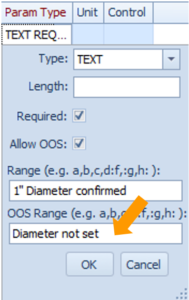
During production you will be presented with the choices specified in the Range and OOS Range fields. If you select an OOS result, you will be stopped until you can record a correct result and proceed.
These two fields also support comma-separated lists. In the example below, you will be presented with 3 choices, and only ‘1 inch’ selection will be considered as allowed.