
Tutorial Video
Work Instruction
Roles are useful when trying to allow or limit access of certain users to certain features of the system. For example, accounts personnel would probably have no need to have access to the manufacturing area of the program and vice versa.
Once a Role is created, it can be assigned to a user in User Update.
It is advised that this functionality only be used after the user has a firm grasp on the different features that the system offers.
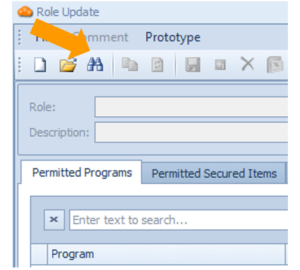
To create a new role, go to Administration >> Role Update
Select Find:
Select “Admin for Chemicals”. Note this is the default admin role.
Click the “Clone” button.
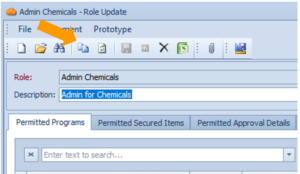
This creates a copy of the role. Enter the role name in the Role field and write a short description in the Description field.
Permitted Programs
In this tab you can set different permission levels for each program for this user. A program is any system function that can either be launched from the main menu or a context menu. Example: Purchase Orders, Print Container Label.
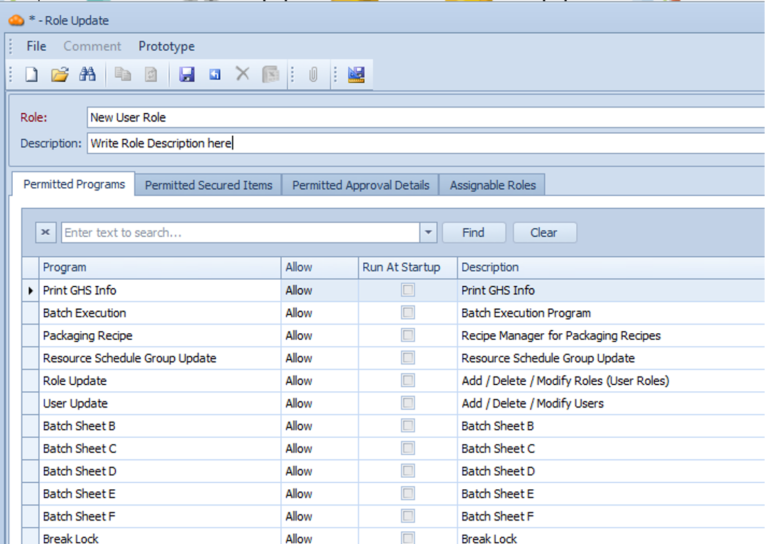
Permission Level Description:
Allow: Lets the user access the full functionality of that program.
Read Only: Lets the user view the program and the details of any data stored, but not edit it.
(Blank): Hides the program from the user and prevents them from accessing it. To do this, click on the Allow area and click Backspace on your keyboard. This should result in an empty field.
It is important to note that if you remove a program from the role assigned to your own user account, you cannot put it back.
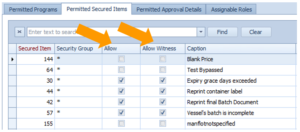
Permitted Secured Items
This tab displays the secured items that are available for use. User access to the different secured items can be configured by checking or unchecking them in the Allow column. The Allow Witness column determines if the user can be an applicable witness to the specific secured item.
Secured Items define security requirements for actions and events that take place within Mar-Kov. Actions are things that a user can do such as “Save”, while events are system-generated conditions, such as “yield is out of tolerance”. Secured items can require permission to be performed by a user, and can also require a Signature, a Witness Signature, or Reason.
Permitted Approval Details
This tab defines which Approval Details may be approved or rejected by users with this role
Approvals are requirements for a user signature, allowing that particular user to approve particular actions, such as publishing a recipe or releasing an order.
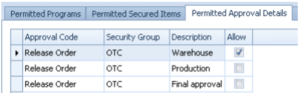
Checking or unchecking the Allow field grants them approval.
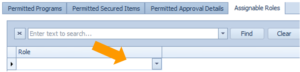
Assignable Roles
The Assignable Roles tab describes which roles this new role is able to give. This feature is useful if the role being created has some administrative responsibility and would need to create roles themselves.
This can be achieved by clicking the dropdown menu and selecting the appropriate role. Clicking on the empty space below adds another assignable role.
Note that to assign the newly created role to a user, you must then Update your own role (most likely Admin), and add the newly created role in this tab.
Save your progress by clicking the save button or Ctrl + S on your keyboard.
After these steps are completed, you are now able to assign the newly created role to a user. For more information about updating a User’s Roles, please refer to the Role Update section.