Work Instruction
Android devices are becoming more commonly used for warehousing operations as they are a more portable alternative to laptop and tablet devices. Please contact your Customer Success Manager to receive the installation link for your android devices.
Once installed, open the application on the android device to access the Main Menu.
Note: A simulated android application was used to provide the images below.
Log into the database by entering your email, company code, and password. The Main Menu will then appear.
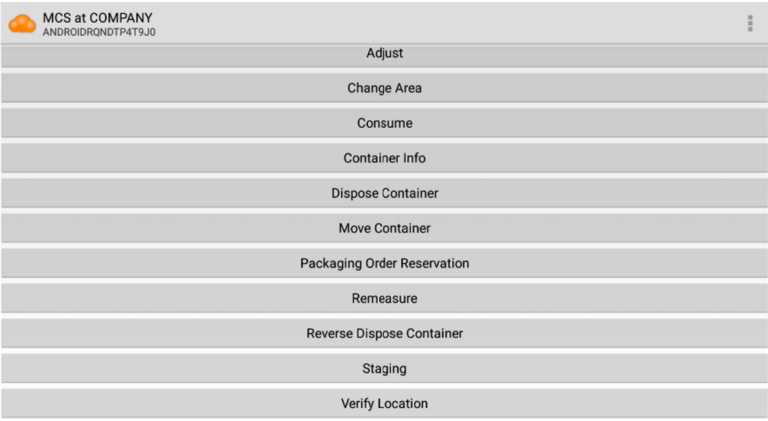
Select the program you wish to use and perform the associated action.
The work instructions below will cover the actions for all programs listed in the main menu, except for Packaging Order Reservation and Staging, as those will be covered in a separate document.
Adjust/Consume/Remeasure
The Adjust, Consume, and Remeasure programs can be used in the same manner. The example below is demonstrated using the Adjust program.
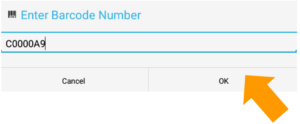
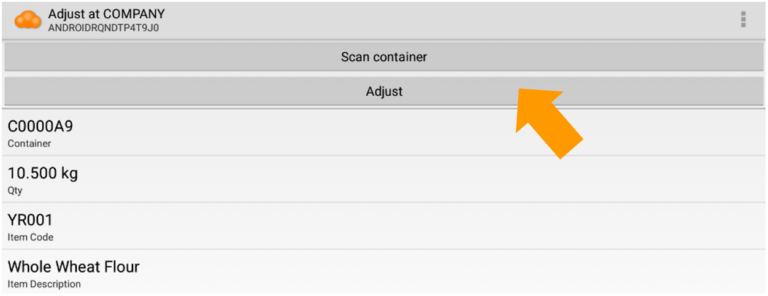
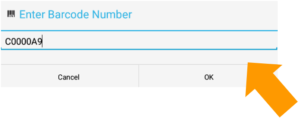
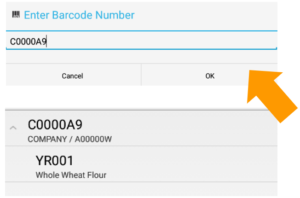
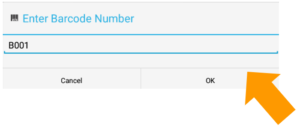
Select the ‘Adjust’ program. Then select the Scan container button, scan the container ID and select OK.

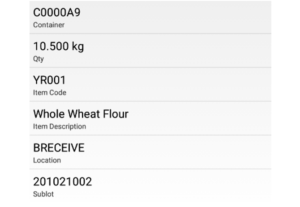
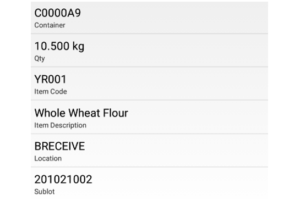
Information about the container will appear below.
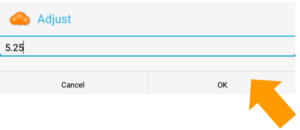
Select the ‘Adjust’ button and enter the amount the container will be adjusted by, then select OK.
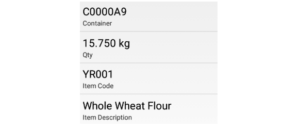
The screen will then display the updated container quantity.
Change Area
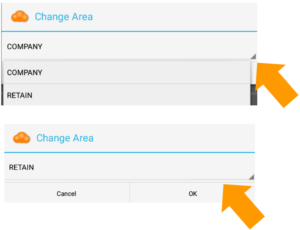
To change warehouses, select the Change Area button. Using the dropdown menu, select a new area and press OK.
Container Info
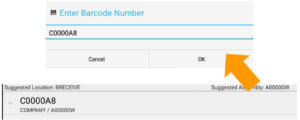
To view information about a relevant container, select the Container Info button. Then select the Scan container button, scan the container ID and select OK.
Information about the container will appear below.
Dispose Container
To dispose of a container, select the Dispose Container button. Then, select the Scan container button, scan the container ID and select OK. You may repeat this step to scan multiple containers. Information about the container will appear below.
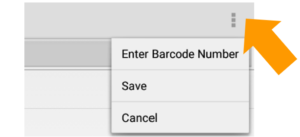
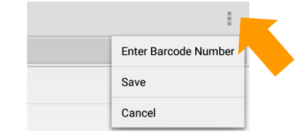
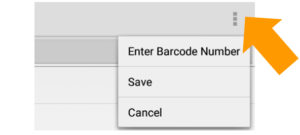
Using the three dots located on the top right corner, select the ‘Save’ button to save the disposal of the scanned containers. Select ‘Cancel’ if you do not wish to dispose of the scanned container.
Reverse Dispose Container
To reverse the disposal of a container, select the Reverse Dispose Container program. Then, select the Scan container/pallet button, scan the container ID and select OK. You may repeat this step to scan multiple containers. Information about the container(s) will appear below.

Using the three dots located on the top right corner, select the ‘Save’ button to save and reverse the disposal of the scanned containers. Select ‘Cancel’ if you do not wish to reverse the disposal of the scanned container.
Move Container
To move a container/pallet from one bin location to another, select the Move Container button. Then, select the Scan container/pallet button, scan the container ID and select OK. You may repeat this step to scan multiple containers. Information about the container will appear below.
When it is time to move the scanned containers to another location, select the Scan next container/pallet or target location and scan the target location ID and press OK.
The container will be moved to the target location.
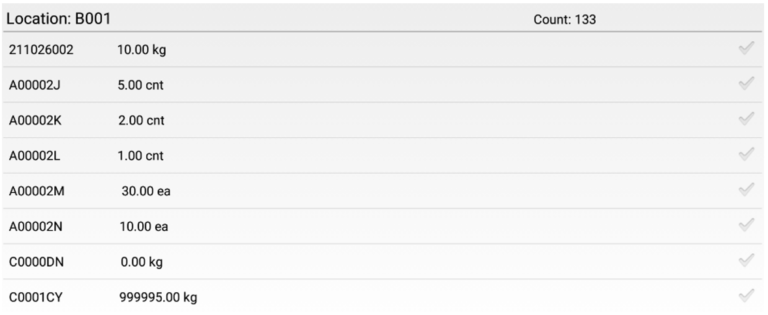
Verify Location
To verify containers for a specific location, select the Verify Location button. Then, select the Scan Location button, scan the location ID and press OK.
Information about the containers in that location will appear below.
To confirm the containers in that location, press the checkmark icon or select the Scan container or save button to scan a container/assembly ID and press OK.

Confirmed containers will display a green checkmark on the right.
Using the three dots located on the top right corner, select the ‘Save’ button to save and confirm the containers for that location. Select ‘Cancel’ if you do not wish to confirm containers in that location.